How to Bake Makeup: The Technique, Tools & When to Skip It
The short answer
Baking is a technique where you press excess loose powder onto concealer.
What is baking in makeup?
Baking is a setting technique in which you apply a generous, deliberately excessive amount of loose translucent powder onto freshly applied concealer and/or foundation, allow it to sit on the skin for 5–10 minutes, then brush away the surplus. The name reflects what happens during the dwell time: the natural warmth of your skin gently "cures" or heat-sets the makeup beneath the powder layer, producing a crease-resistant, long-wearing matte finish.
The technique has two distinct effects:
- The setting effect: The powder presses the still-wet concealer or foundation into the skin while body heat activates the waxes and binders in the base makeup beneath, forming a more durable film than air-drying alone.
- The smoothing and brightening effect: When the excess powder is swept away, it takes with it any residual wet product from the surface, revealing a freshly matte, even surface. Under the eyes, the technique catches any eyeshadow fall-out during the rest of the eye makeup application — a significant time-saving bonus.
Where baking came from
Baking has its roots in drag and stage performance, where performers need makeup to withstand hot stage lighting, hours of wear, physical movement, and sweat. Long before the technique appeared on social media, drag artists and burlesque performers had developed a vocabulary of professional-grade setting methods — baking among them — that were passed down through drag communities and eventually popularised to mainstream audiences via YouTube and Instagram, particularly around 2015–2016 following Kim Kardashian's makeup artist Mario Dedivanovic demonstrating it publicly.
The technique's mainstream adoption reflects the increasingly production-quality standards that high-definition cameras, photography, and long-event appearances demand from everyday makeup. What worked under stage lights works equally well under flash photography or at a 12-hour event.
What you need
Loose translucent powder — not pressed powder. Loose powder has smaller, more evenly distributed particles that pack more consistently and lift away cleanly. A pressed powder applied wet would cake. Common choices are silica-based loose powders (talc-free) or traditional translucent loose powders. For deeper skin tones, a finely milled warm-toned translucent powder ("banana powder") corrects purple under-eye shadows while setting; check for flashback in direct and flash lighting before committing.
A damp flat brush or damp beauty sponge — the dampness is important. A dry brush or sponge will sweep powder across the surface without pressing it into contact with the still-wet concealer beneath. A slightly damp (not wet) applicator creates the compression needed for the technique to work correctly and produces a smoother finish. Dampen your sponge, wring it fully, then use it to press — not drag — the powder on.
A large fluffy powder brush — for sweeping away the excess powder after the dwell time. The fan brush or a classic fluffy powder brush works well here; a small or stiff brush will disturb the set finish beneath.
Step-by-step: how to bake
See the steps listed below for the full protocol. Here is the reasoning:
Start with skincare and primer. Baking amplifies whatever is beneath it. If the skin surface is dry, dehydrated, or textured, baking will amplify those imperfections. Use a hydrating moisturizer and a smoothing primer before your base. On dry skin, a hydrating primer specifically is essential — even if you are going for a matte baked look, dehydrated skin beneath powder will produce an uneven, cracked result.
Apply foundation before concealer. Foundation sets the overall base. Concealer goes on top, targeted to specific areas — under-eye, blemishes, around the nose. Both should be fully blended before you begin baking.
Use a damp sponge to press powder generously. Load the damp sponge or flat brush heavily with loose powder and press it firmly onto the areas you want to bake — typically under the eye extending to the cheekbone, across the T-zone, or anywhere you want the most durability. You are pressing thick but the excess will be swept away; do not be shy about the initial application.
Leave the powder undisturbed for 5–10 minutes. Use this time to complete the rest of your eye makeup (eyeshadow, liner, mascara). Any shadow fall-out will land on the still-powdered area and be removed with the excess powder — a professional technique that saves cleanup time. Do not talk or move your face excessively during this window as this can disrupt the powder before it has set.
Sweep away excess with a fluffy brush. Use light, sweeping downward strokes to remove the surplus powder. The skin beneath should look freshly matte, even, and bright. Any chalky residue can be addressed with a light mist of setting spray.
Finish with setting spray. A fine mist of setting spray over the entire face softens any sharp powder edges, melts the baked zones into the rest of the look, and adds a further layer of bonding across all the makeup. This is a recommended but optional step — some people prefer the very matte finish without spray.
Where to bake and where not to
High-benefit zones
- Under-eye area: The most common baking zone. Concealer under the eyes is prone to creasing in the fold; baking significantly extends the crease-free window, particularly for people with very mobile expressions or deep-set eyes.
- T-zone (forehead, nose, chin): On oily skin, these are the primary breakdown areas. Baking here keeps oil at bay longer than a single dusted layer of powder.
- Jawline and lower face: For contouring and coverage that needs to withstand a long day.
Skip these zones
- Smile lines and laugh lines: Powder in dynamic lines makes them more visible, not less.
- Temples and hairline on dry skin: These areas dry out faster and the powder will look chalky quickly.
- Lips (adjacent skin): Baking too close to the lips leads to powder contamination of lip products.
Who should bake — and who should skip it
Bake if you have:
- Oily or combination skin: Baking is purpose-built for oil control. The extended dwell time and compression create a setting that oil takes longer to penetrate.
- A full-coverage look or photographic application: Baking is the standard technique for events where makeup must last all day or under high-definition cameras. The crease-resistance is significantly superior to powder alone.
- Deeper skin tones seeking to brighten the under-eye: A warm-toned translucent or banana powder baked under the eye can counteract purple or ashy discoloration.
Skip baking if you have:
- Dry or dehydrated skin: This is the most important contraindication. Powder draws moisture from the skin surface, and the excess powder in baking exaggerates this effect. If you try to bake on dry skin, the powder will cling to dry patches, sink into lines, and produce a cakey, aged appearance.
- Mature skin: Fine lines and the natural reduction in skin elasticity mean that even a single layer of powder can accentuate texture; a thick baking application will make this significantly worse. Professionals working on mature skin typically avoid baking entirely and opt for setting spray alone.
- Very textured skin (large pores, acne scarring): Powder fills and then draws attention to textural irregularities, particularly when applied in excess. If texture is a concern, use a silicone-based primer to fill and a very light dust of powder only; skip baking.
- Minimal or skin-finish makeup: Baking is categorically a full-coverage technique. Using it with a sheer or skin-like foundation contradicts the product and produces an inconsistent, over-powdered look.
Common baking mistakes
Applying powder to dry skin: Always bake on top of still-wet or freshly set concealer, not on concealer that has already dried and oxidised. If your concealer has completely dried, the powder won't compress into it — it will just sit on top and sweep away without setting anything.
Using pressed powder instead of loose: Pressed powder applied with a damp tool reconstitutes and produces a thick, uneven application. Use loose powder for baking.
Leaving powder on too long: 5–10 minutes is optimal. More than 15 minutes does not improve the set and risks the powder shifting, oxidising, or looking excessively chalky by the time you brush it off.
Baking all over the face: This is not a full-face technique unless you are doing professional theatrical or film makeup. On the everyday face, bake strategically — the under-eye zone and T-zone only — and use setting spray for the rest.
Using a dry sponge: The damp application is functional, not optional. A dry sponge or brush applies powder loosely on the surface rather than pressing it into contact with the still-wet makeup beneath. The effect on a dry applicator is much closer to a normal powder application — effective but without the intensified setting of true baking.
Baking vs. regular powder setting
| Regular powder | Baking | |
|---|---|---|
| Amount of powder | Light-to-moderate veil | Deliberately excess; swept away after |
| Applicator | Dry brush or sponge | Damp sponge or brush |
| Dwell time | Immediate blend | 5–10 minutes undisturbed |
| Finish | Satin to matte | Matte (can be softened with spray) |
| Wear longevity | Good | Superior, especially crease resistance |
| Best for | All skin types (used lightly) | Oily skin, full-coverage, photography |
| Risk on dry skin | Low with light application | High — can look cakey and aged |
After baking: the finishing steps
Once the excess powder is swept away, check for any over-powdered zones that look chalky or flat. A setting spray misted over the entire face will:
- Soften the matte finish if desired
- Melt any powdery edges between the baked zone and the rest of the face
- Bond all remaining makeup layers together for further longevity
See the setting spray vs setting powder guide for a full breakdown of how to combine these two finishing products optimally.
Step by step
- 1
Prep skin with moisturizer and primer
Apply your usual moisturizer and allow it to absorb for 2–3 minutes. Then apply a primer suited to your skin type — smoothing/pore-filling for oily skin, hydrating for dry or combination. A proper base prevents the powder from settling into dry patches or pores. Skip this step and baking will emphasize, not conceal, uneven texture.
- 2
Apply foundation and concealer
Apply and blend your foundation all over, then add concealer to targeted zones — under the eyes, around the nose, over any blemishes or discoloration. Blend fully. The concealer should still be wet or very freshly set when you begin baking; baking on completely dry concealer reduces the setting effect. For under-eye baking, go a shade lighter than your skin tone to brighten the zone.
- 3
Dampen your applicator
Dampen a flat-edged beauty sponge or a flat powder brush with clean water, then wring or blot it until it holds no standing water — it should feel damp, not wet. The dampness creates compression that presses the powder into close contact with the wet concealer beneath, producing a smoother, more even set than a dry applicator.
- 4
Press loose powder generously onto baking zones
Load the damp sponge or brush heavily with loose translucent powder. Press — do not swipe — it firmly onto the zones you are baking: typically under-eye and cheekbone, T-zone (forehead, nose, chin), or jawline. The powder layer should appear thick and white initially. This is intentional — the excess is what you will brush away after the dwell time. Apply with firm, patting pressure for best contact.
- 5
Leave undisturbed for 5–10 minutes
Set a timer. Do not touch the baked zones. Use this time to complete the rest of your eye makeup — eyeshadow fall-out from this step will land on the powdered under-eye area and be swept away with the excess, saving cleanup. Speak and move minimally to avoid disrupting the set. 5 minutes is sufficient for most skin types; 10 minutes is appropriate for very oily skin or a high-coverage goal.
- 6
Sweep away excess powder with a fluffy brush
Use a large, fluffy powder brush or fan brush to sweep away the excess powder in light, downward strokes, working from the baked areas outward. Do not press or rub — light sweeping strokes remove the surplus without disturbing the set layer beneath. The baked zone should now appear freshly matte, bright, and significantly smoother. Any remaining chalky patches indicate powder that didn't set into the makeup — brush more thoroughly.
- 7
Finish with setting spray
Hold a setting spray 8–10 inches from your face and mist in a T, then X pattern across the whole face. Close your eyes and mouth. Allow 30–60 seconds to dry without touching your face. The spray softens the boundary between baked and non-baked zones, melts any residual chalkiness, and deposits film-forming polymers over the full look for further longevity and transfer resistance.
Products that fit this guide
Picked by code from each product's full ingredient list.

Essence
CORRECT & CONCEAL under eye brightening concealer
concealer · 3.5 ml · 22 ingredients
- Fragrance-free
- No essential oils
- With glycerin
- With titanium dioxide
- With aloe vera

Essence
Silky Blur Hydrating Longwear Concealer
concealer · 10 ml · 26 ingredients
- Fragrance-free
- No essential oils
- With hyaluronic acid
- With glycerin
- With squalane
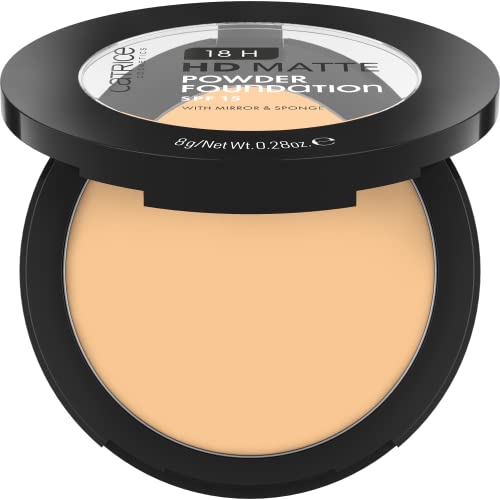
Catrice
18H HD Matte Powder Foundation
foundation · 8 g · 19 ingredients
- Fragrance-free
- No essential oils
- With titanium dioxide
- With dimethicone

Catrice
Cloud Tint Cushion Highlighter
foundation · 4 g · 19 ingredients
- Fragrance-free
- No essential oils
- With glycerin
- With titanium dioxide
- With vitamin e
Frequently asked questions
Is baking still a relevant technique in 2026, or has it been replaced?
Baking remains a standard technique for full-coverage, long-wear, and photographic applications in 2026. What has changed is that mainstream adoption has become more selective — the blanket all-over baking trend of the mid-2010s has given way to strategic zone-baking (under-eye and T-zone only), paired with setting spray to unify the finish. For stage, drag, event, and photography makeup, baking is still a professional-grade tool. For everyday wear, most people benefit more from a single light layer of powder and a good setting spray.
Why do I look cakey after baking?
Cakiness after baking almost always has one of three causes: dry or dehydrated skin that the powder clings to (the most common cause), using too much powder without brushing away enough excess, or baking on concealer that had already dried before you applied the powder. For dry skin, baking is genuinely the wrong technique — use a light powder touch or none at all, and rely on setting spray for longevity. For the other two issues, ensure skin is well hydrated before starting and brush away the excess more thoroughly.
What is banana powder and do I need it for baking?
Banana powder is a warm yellow-toned loose powder — not yellow-colored, but warm rather than cool or neutral. The yellow tone counteracts purple, gray, or blue under-eye darkness, brightening the zone as it sets. It is not required for baking — translucent powder works for all skin tones if you just want the setting effect without color correction. Banana powder adds value if you want to brighten deep-set or dark under-eye areas as well. People with very fair or cool skin tones should test banana powder carefully, as the warm pigment can read orange on very pale skin.
Can I bake with pressed powder?
Pressed powder is not ideal for baking. The binding agents that compress loose powder into a cake can become streaky or gummy when applied with a damp tool over wet concealer. Loose powder has finer, more evenly distributed particles that sweep cleanly from the skin after the dwell time. If you only have pressed powder, apply it with a dry brush in a light layer rather than baking — you won't get the same effect, but you'll get a functional setting step.
How long should I leave the powder on when baking?
5–10 minutes. This is the window in which skin heat effectively sets the makeup beneath without the powder beginning to shift, oxidise, or build up into an unmanageable layer. There is no benefit to leaving it on longer — 10 minutes is the outer limit for most applications. Leaving powder on for 20–30 minutes, as some social media tutorials suggest, does not produce a better set and increases the risk of a chalky, overdone result.
Will baking make my makeup look too matte or flat?
Baking does produce a noticeably matte finish in the baked zones, which can look flat if not finished correctly. The solution is a setting spray applied after baking: the spray softens the matte into a more natural satin, blends the baked zones into the surrounding skin, and adds a subtle luminosity without undoing the longevity benefits. You can also skip baking the high points of the face (cheekbones, brow bone, tip of the nose) and add a highlight product there instead — this gives the contrast of matte setting against dewy highlight.
Sources
- 01Baking (make-up) — Wikipedia — Wikipedia. Baking technique originated in the drag and burlesque communities; popularised to mainstream beauty audiences via social media in the 2010s; involves pressing loose powder onto wet concealer and allowing body heat to set the base makeup beneath.
- 02Celebrating the History of Drag Makeup for Pride Month — Beautyblender. Techniques including baking and contouring originated in drag dressing rooms, passed down through drag communities generationally before entering mainstream beauty culture.
- 03How to Bake Your Makeup Like a Pro, Plus the Products You'll Need — Makeup.com by L'Oréal. Baking technique involves pressing loose powder generously onto freshly applied base makeup, leaving 5–10 minutes for the skin's warmth to set the foundation and concealer, then brushing away excess for a crease-resistant finish.
- 04How to Fix Cakey Makeup Without Starting Over — Revlon. Cakey makeup after baking is most commonly caused by dry or dehydrated skin beneath the powder; moisturizing adequately before application prevents powder from clinging to dry patches.