How to Remove Gel Nails at Home Without Damaging Your Nails
The short answer
Remove gel nails safely using 100% acetone, sized cotton pieces.
Why Removal Method Matters More Than the Gel Itself
Most nail damage attributed to "gel" is actually damage caused by incorrect removal. The gel formula, cured properly onto a prepared nail, sits above the nail plate without chemically penetrating it. When you peel or force off gel, however, you are pulling up the outermost layers of the nail plate with it — this is what produces the characteristic white, chalky, papery nails that people associate with gel damage.
A 2024 literature review in Dermatology Reports noted that "worn-down nail syndrome" — thinning of the nail plate from over-filing — and pseudoleukonychia (white spots from plate layer removal) are among the most common documented complications of DIY gel manicures, almost entirely preventable with correct soak-off technique.
The American Academy of Dermatology's board-certified dermatologist guidance is unambiguous: the safest way to remove gel is to let nails grow out (clipping weekly), and the safest active-removal method is the acetone soak-off described above.
What You Need
| Item | Specification | Why it matters |
|---|---|---|
| Acetone | 100% pure (not standard remover, which is too diluted) | Diluted remover won't soften gel in a reasonable time |
| Cotton | Cotton balls or strips — not synthetic | Synthetic fibers release poorly; cotton holds acetone efficiently |
| Plastic wrap | Food wrap (not foil) | Plastic creates a tighter seal, less acetone evaporation |
| Petroleum jelly | Any brand | Protects skin from acetone dryness |
| Emery board | Light grit | Only to break the top coat seal — not to file through gel |
| Washcloth | Soft, damp | Gentle removal of softened gel residue |
Surface protection: Acetone dissolves many lacquers, paints, and plastic finishes. Line your work surface with a plastic sheet or silicone mat, then a towel. Acetone is flammable — work away from open flames.
The Acetone Soak-Off Method: Full Protocol
Follow the 11-step process above. The key discipline points that most people skip are:
Sizing the cotton. Most people use a cotton ball roughly pressed to the nail. A ball larger than the nail deposits acetone on the skin for the full soak period, accelerating irritation. Cutting the cotton to fit each nail is the single easiest improvement to most people's removal routine.
Petroleum jelly before, not after. Applying the petroleum jelly barrier before the soak — not just at the end — meaningfully reduces skin irritation during the 10-minute exposure window.
Respecting the soak time. Ten minutes is the minimum for most gel polish formulas. Checking at 6 minutes and finding resistance, then scraping, is how most nail damage from removal occurs. Re-wrap for another 5 minutes instead.
The 7-day aftercare. This is the step most commonly skipped and most clinically significant. The nail plate is transiently dehydrated after acetone exposure. Daily petroleum jelly for one week restores surface lipids and measurably reduces brittleness.
Alternative: Growing Out the Gel
The AAD's Dr. Shari Lipner recommends that the least damaging removal method is simply allowing the gel to grow out:
- As the nail grows, the gel-covered portion advances distally toward the fingertip
- Clip the free edge (including the gel portion) once per week
- After 2–3 weeks of weekly clips, most of the gel has been removed without any acetone or tool contact with the nail plate
- The remaining thin strip near the fingertip can be soaked off in a brief session
Practical limitation: This approach leaves a visible grow-out gap at the cuticle for 3–4 weeks, which is cosmetically acceptable only if you either top it with regular polish or are comfortable with the bare look. It is, however, the method that produces zero nail-plate damage and is the recommendation for anyone whose nails are already compromised.
Removing Dip Powder Nails
The method is identical but requires more time:
- Soak time: 15–20 minutes (versus 10 for gel) — dip powder layers are thicker
- Multiple passes: After the first soak, some layers may remain; re-wrap and soak again rather than scraping
- Activator coating: The clear activator layer in dip systems is particularly resistant; a second 5–10 minute soak is common
Do not use a nail drill (e-file) at home for dip removal. E-file removal of dip powder requires precise pressure control and professional skill. Without training, home e-file use risks drilling into the nail plate itself, causing grooving, pain, and matrix damage.
What to Do If You Have Already Peeled or Scraped
If your nails are already showing white patches, thinning, or surface irregularity from previous removal:
- Do not re-apply gel immediately. Allow at least 2–4 weeks of bare nail time.
- Apply a nail-hardening base coat (look for formulas containing calcium or protein; avoid formaldehyde-containing hardeners, which can actually cause onycholysis with overuse).
- Moisturize daily — petroleum jelly, cuticle oil, or a ceramide-rich hand cream to nails and cuticles.
- Keep nails short while they recover — shorter nails exert less leverage force on the compromised plate.
- See a dermatologist if white patches are not growing out normally, or if you notice nail-plate separation, pain, or discharge — these need clinical evaluation to rule out fungal infection or true nail-plate injury.
When to Go to a Salon Instead
Home gel removal is appropriate for standard soft gel polish and dip powder. Seek professional removal if:
- Your gel nails are hard gel or builder gel (these are not soak-off formulations and require filing to remove)
- You have nail extensions built with acrylic or gel — the removal involves more material and more risk at home
- Your gel has lifted significantly at the cuticle, allowing moisture and debris under the nail — this needs professional assessment
- You have known nail disease (psoriasis, fungal infection, onycholysis) — disrupting compromised nails at home risks worsening the condition
For more on the types of gel and what distinguishes them, see Every Type of Manicure and Is Gel Nail Polish Bad for Your Nails.
Step by step
- 1
Gather your materials
You need: 100% pure acetone (not regular nail polish remover, which is too dilute), cotton balls or cotton strips, scissors, plastic food wrap (not foil — plastic creates a tighter seal), petroleum jelly (Vaseline), a light-grit emery board or nail file, and a soft washcloth. Lay a plastic-lined towel over your work surface — acetone dissolves many finishes.
- 2
Protect your skin with petroleum jelly
Apply a thin layer of petroleum jelly to each cuticle and the skin surrounding the nail — not the nail plate itself. This creates a barrier that prevents acetone from dehydrating and irritating the skin during soaking. Skip this step and you risk significant skin dryness and peeling around the nail folds.
- 3
Lightly buff the top coat
Use a light-grit emery board to gently scuff the shiny top coat surface of each nail — a few light passes, not aggressive filing. This breaks the sealed top-coat barrier and allows acetone to penetrate faster. Do not file through the full gel layer; this step is only to dull the surface shine.
- 4
Cut cotton to nail size
Cut your cotton balls or strips to match the size of each individual nail. The cotton should cover the nail but not significantly overlap onto the surrounding skin. Sized correctly: pinkies need approximately one-quarter of a cotton ball; other fingers approximately half. Smaller cotton pieces mean less acetone contact with your skin during the soak.
- 5
Saturate cotton in acetone and apply
Pour 100% acetone onto each cut cotton piece until saturated but not dripping. Place each piece directly on top of its matching nail, pressing firmly so the entire nail surface is in contact with the acetone-soaked cotton.
- 6
Wrap with plastic food wrap
Cut small strips of plastic food wrap and wrap each nail tightly enough to hold the cotton in place without cutting off circulation. Plastic food wrap creates a tighter seal than foil, preventing acetone evaporation and improving soak efficiency. You should be able to feel the cotton pressing firmly against the nail underneath.
- 7
Wait 10 minutes
Leave the wraps in place for a full 10 minutes without disturbing them. For dip powder (thicker than gel), extend to 15–20 minutes. Do not unwrap and check early — this releases the acetone vapor and stalls the softening process. You can use this time to sit quietly or watch something, but avoid any activity that risks loosening the wraps.
- 8
Remove and wipe gently
Unwrap one nail at a time. The gel should look visibly softened, lifted, or crumbled. Use the damp washcloth or the same cotton piece to gently wipe the nail surface. The softened gel should come away with light pressure. If a spot resists, re-wrap that nail for an additional 5 minutes rather than forcing it.
- 9
Never scrape or force resistant gel
Do not use metal tools, orange sticks, or your own nails to force off gel that has not fully softened. The AAD specifically warns against orange sticks for gel removal because the pressure required to remove under-soaked gel damages the nail plate and causes white spots. Re-soak and wait.
- 10
Wash hands and moisturize immediately
Wash hands thoroughly with a gentle, fragrance-free soap and lukewarm water to remove all acetone residue. Immediately apply petroleum jelly to the nail plates, cuticles, and surrounding skin. Do this before your hands dry out.
- 11
Follow up for 7 days
Apply petroleum jelly (or a ceramide-containing cuticle oil) to nails and cuticles every day for 7 days after removal. This is the AAD-recommended recovery protocol. Acetone removes surface lipids from the nail plate; daily rehydration during this window measurably reduces post-removal brittleness. Avoid gel re-application for at least 1–2 weeks.
Products that fit this guide
Picked by code from each product's full ingredient list.

Catrice
Aura Glam Nail Polish
nail polish · 10.5 ml · 22 ingredients
- Fragrance-free
- No essential oils
- With titanium dioxide

Catrice
Base & Top Coat Allround 2-in-1
nail polish · 10.5 ml · 10 ingredients
- Fragrance-free
- No essential oils
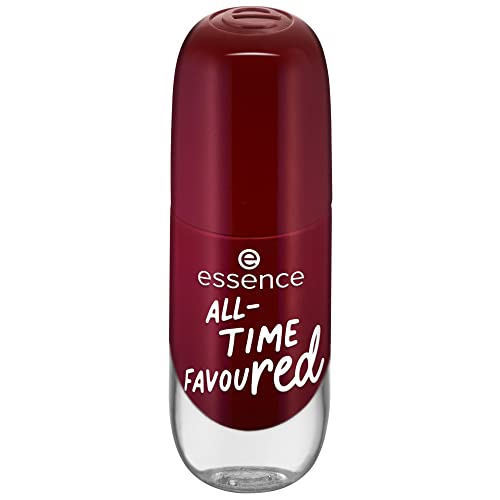
Essence
Gel Nail Colour
nail polish · 8 ml · 9 ingredients
- Fragrance-free
- No essential oils
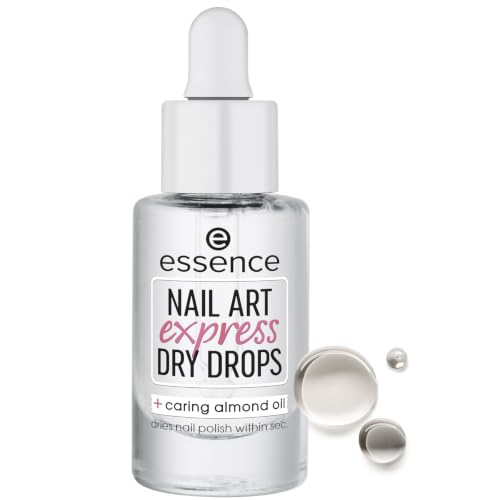
Essence
Nail Art Express Dry Drops
nail polish · 8 ml · 5 ingredients
- Fragrance-free
- No essential oils
- With vitamin e
Frequently asked questions
Is it safe to remove gel nails at home in 2026?
Yes — the acetone soak-off method described here is endorsed by the AAD for home use. The technique has not changed; the evidence that peeling causes nail damage and correct soaking does not is well-established. The main risks of home removal are using insufficient soak time (leading to scraping) and skipping the post-removal moisturizing protocol. Both are addressed by following the steps above. Professional removal is recommended for hard gel extensions or significantly lifted nails.
How long does it take to remove gel nails at home?
The acetone soak takes 10 minutes for standard gel polish. Add 5–10 minutes for prep (cutting cotton, applying petroleum jelly, buffing top coat) and 5–10 minutes for cleanup. Total time: 20–30 minutes for a careful first attempt, faster with practice. Dip powder requires 15–20 minutes of soaking, making the process 30–40 minutes total.
Can I use regular nail polish remover to take off gel nails?
No — standard nail polish removers contain 30–70% acetone with added water, oils, and conditioning agents. This diluted formula is too weak to soften cured gel in a reasonable time frame. You need 100% pure acetone, available at most drug stores and beauty supply stores. Using a weaker remover extends the soak time to the point where most people give up and start scraping — exactly what causes the damage.
Why do my nails look white and chalky after removing gel?
White, chalky nail-plate patches (pseudoleukonychia) are caused by physical removal of the superficial nail-plate layers — typically from peeling, scraping, or forcibly removing gel that hasn't fully softened. The acetone itself does not cause this; mechanical force does. These patches grow out with the nail plate over 4–8 weeks. During the recovery period, keep nails short, apply petroleum jelly daily, and avoid re-applying gel until the affected area has grown off.
How soon can I get a new gel manicure after removing the old one?
The AAD recommends a 1–2 week bare-nail period between gel services to allow the nail plate to rehydrate. If your nails show any thinning, white patches, or brittleness after removal, extend the break to 3–4 weeks. Applying regular (non-gel) polish during this recovery period is fine; it does not impede rehydration.
Health information, not medical advice.
Beauty Comparison is an independent editorial publication. This page is researched and sourced to the authorities listed below, but it is general information — not a diagnosis or a substitute for personalised advice from a qualified doctor, dermatologist or pharmacist. If your symptoms are severe, spreading, painful, or not improving, see a healthcare professional.Sources
- 01Dermatologist's guide to removing gel nail polish at home — American Academy of Dermatology (aad.org). AAD step-by-step protocol: petroleum jelly on skin first, cotton sized to nail, plastic wrap seal, 10 minutes, gentle wipe — no orange sticks; petroleum jelly to cuticles daily for 7 days after; growing out by weekly clipping is the safest removal method.
- 02Gel manicures: Tips for healthy nails — AAD news release — American Academy of Dermatology (aad.org). AAD advises against picking gel polish; only soak fingertips in acetone; take 1–2 week breaks after removal; apply moisturizing product to nails and cuticles multiple times daily between manicures.
- 03Adverse Effects of Do-It-Yourself Nail Cosmetics: A Literature Review — PubMed Central / Dermatology Reports, 2024-01-01. Worn-down nail syndrome and pseudoleukonychia documented as common DIY gel removal complications; mechanical force (peeling, scraping) is the mechanism; recommends limiting acetone removals and applying moisturizers after soaking; carry out removal in ventilated room.
- 04Dermatologic Conditions Associated With Various Types of Popular Nail Cosmetics: A Systematic Review — PubMed Central / Journal of Cosmetic Dermatology, 2025-01-01. At-home gel removal associated with higher complication rates than professional salon removal; improper removal is the primary mechanism of physical nail-plate damage including onycholysis and nail thinning.